Download PS2 BIOS for ArmSX2 Emulator
The PS2 BIOS is a crucial component for running PS2 emulation, connecting the hardware to the PS2 software system. Modern emulators like PCSX2, AetherSX2, and ArmSX2 require the PS2 BIOS to run PS2 games smoothly and at maximum performance.
The PS2 BIOS has various variants such as USA NTSC, EUROPA PAL, JAPAN NTSC, RUSSIA PAL, China NTSC, and Hong Kong/ASIA NTSC. Each of which must be appropriate for your region. For example, if you live in America, you must use the BIOS version for USA NTSC. If you are in another region, you can adjust it to suit your hardware.
How to Install PS2 BIOS on ArmSX2
Installing your BIOS file in ArmSX2 is a quick 6-step process. Follow the guide below.
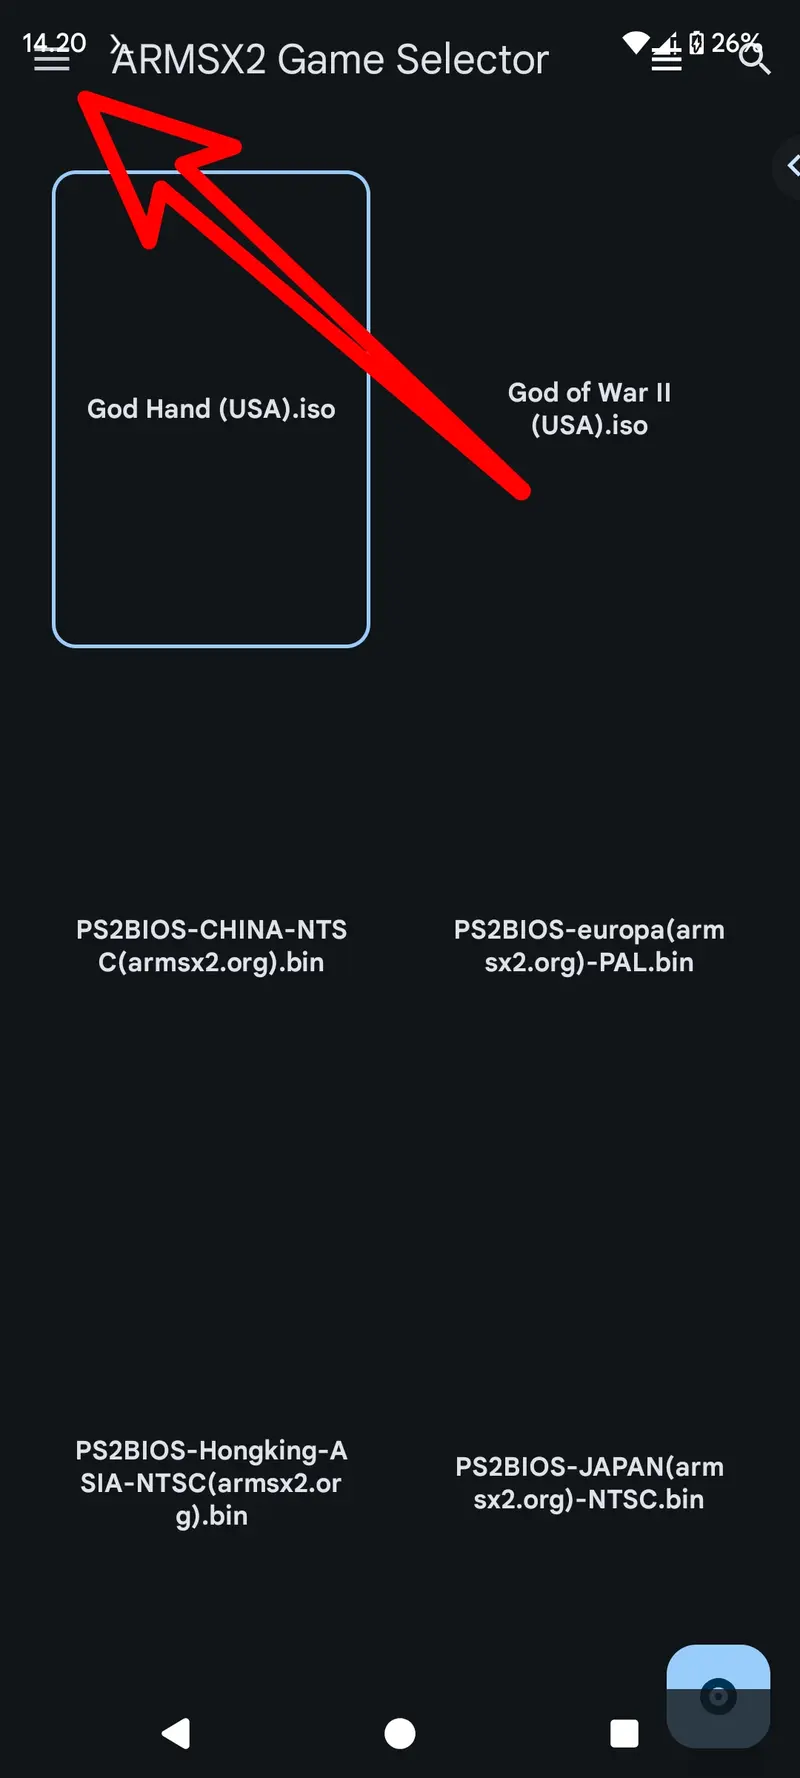
- Open the Sidebar
First you have to open the ARMSX2 application, then you are in the main interface of ARMSX2, tap the hamburger menu icon in the upper left corner to open the sidebar containing several menus.
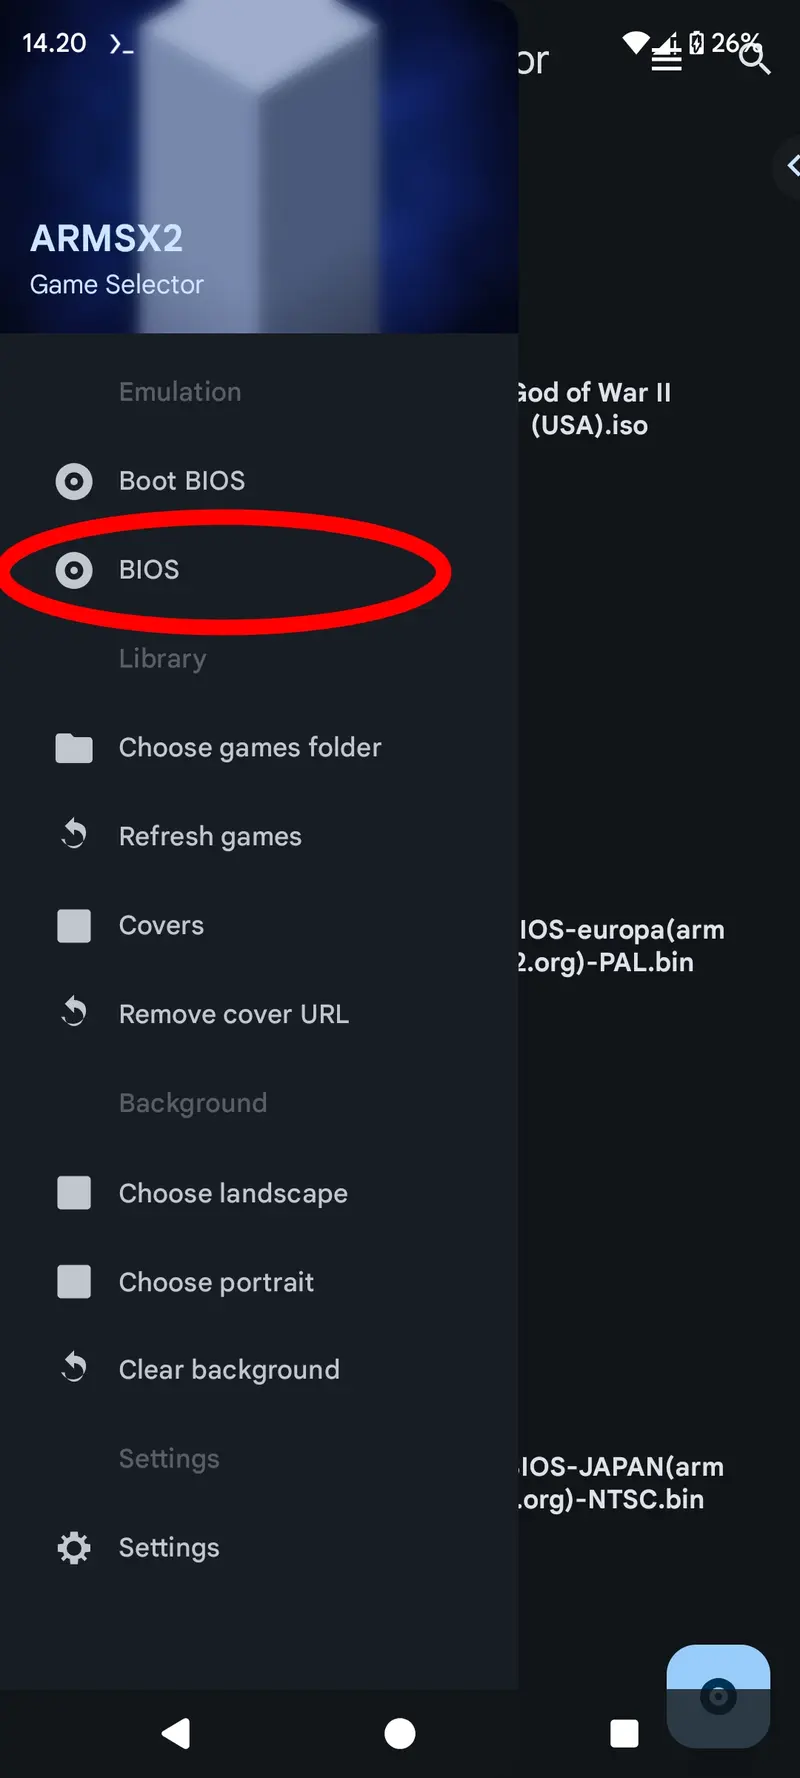
- Select 'BIOS'
From the sidebar, scroll down and tap the 'BIOS' menu to open the BIOS settings.
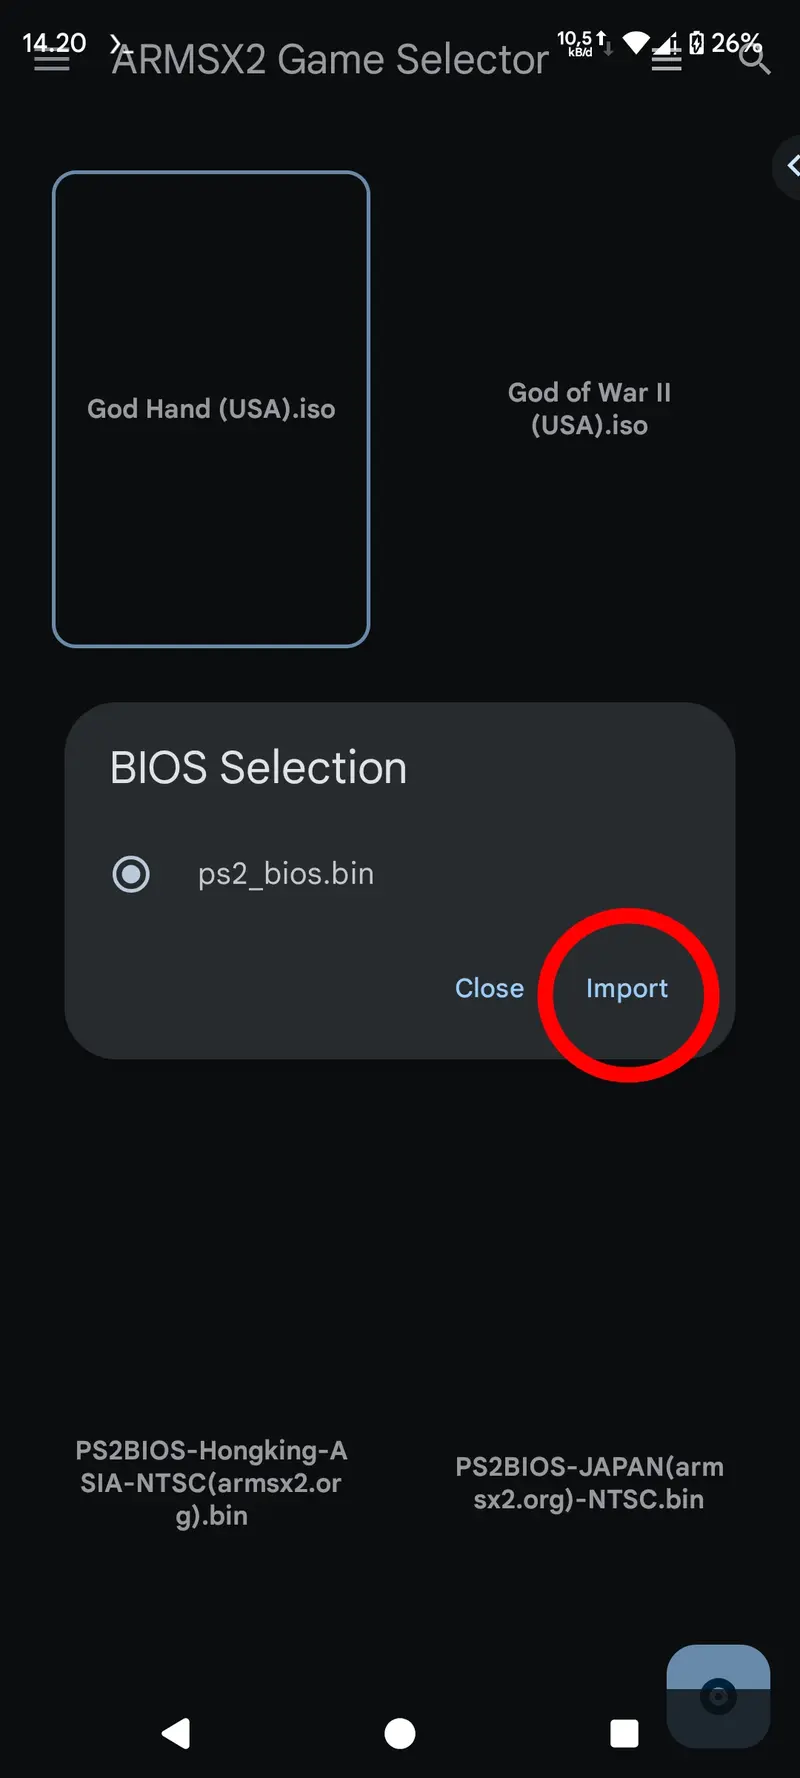
- Import BIOS File
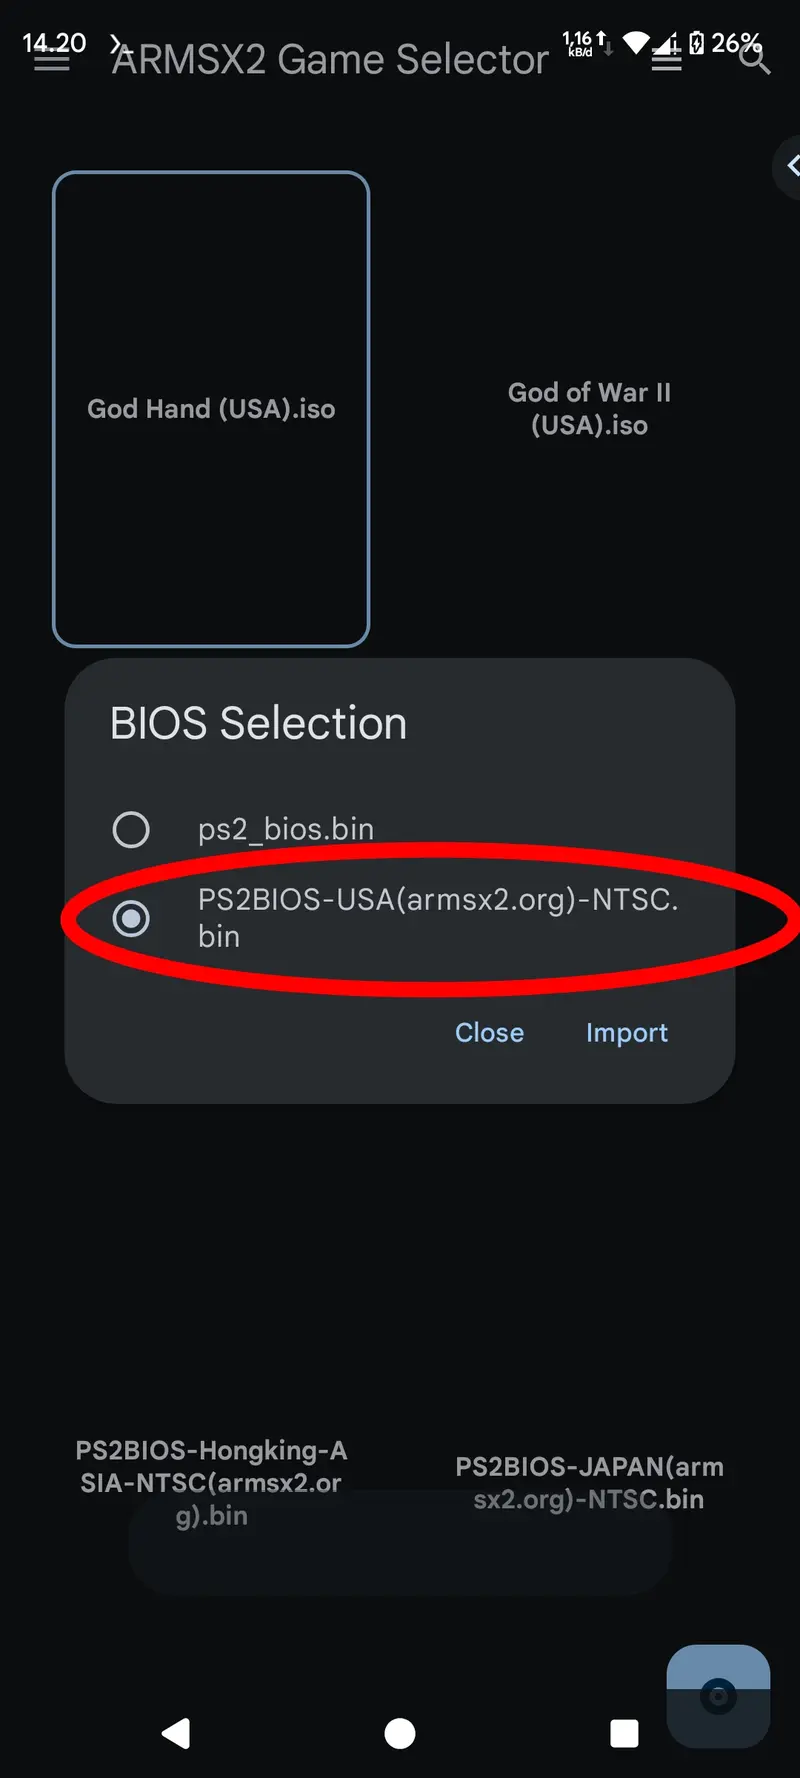
On the "BIOS Selection" screen, tap the "Import" button to import files from your file manager.
- Select Your BIOS File
Navigate to the folder where you saved the PS2 BIOS file (for example,
PS2BIOS-USA(armsx2.org)-NTSC.bin) and tap to select or import the bios.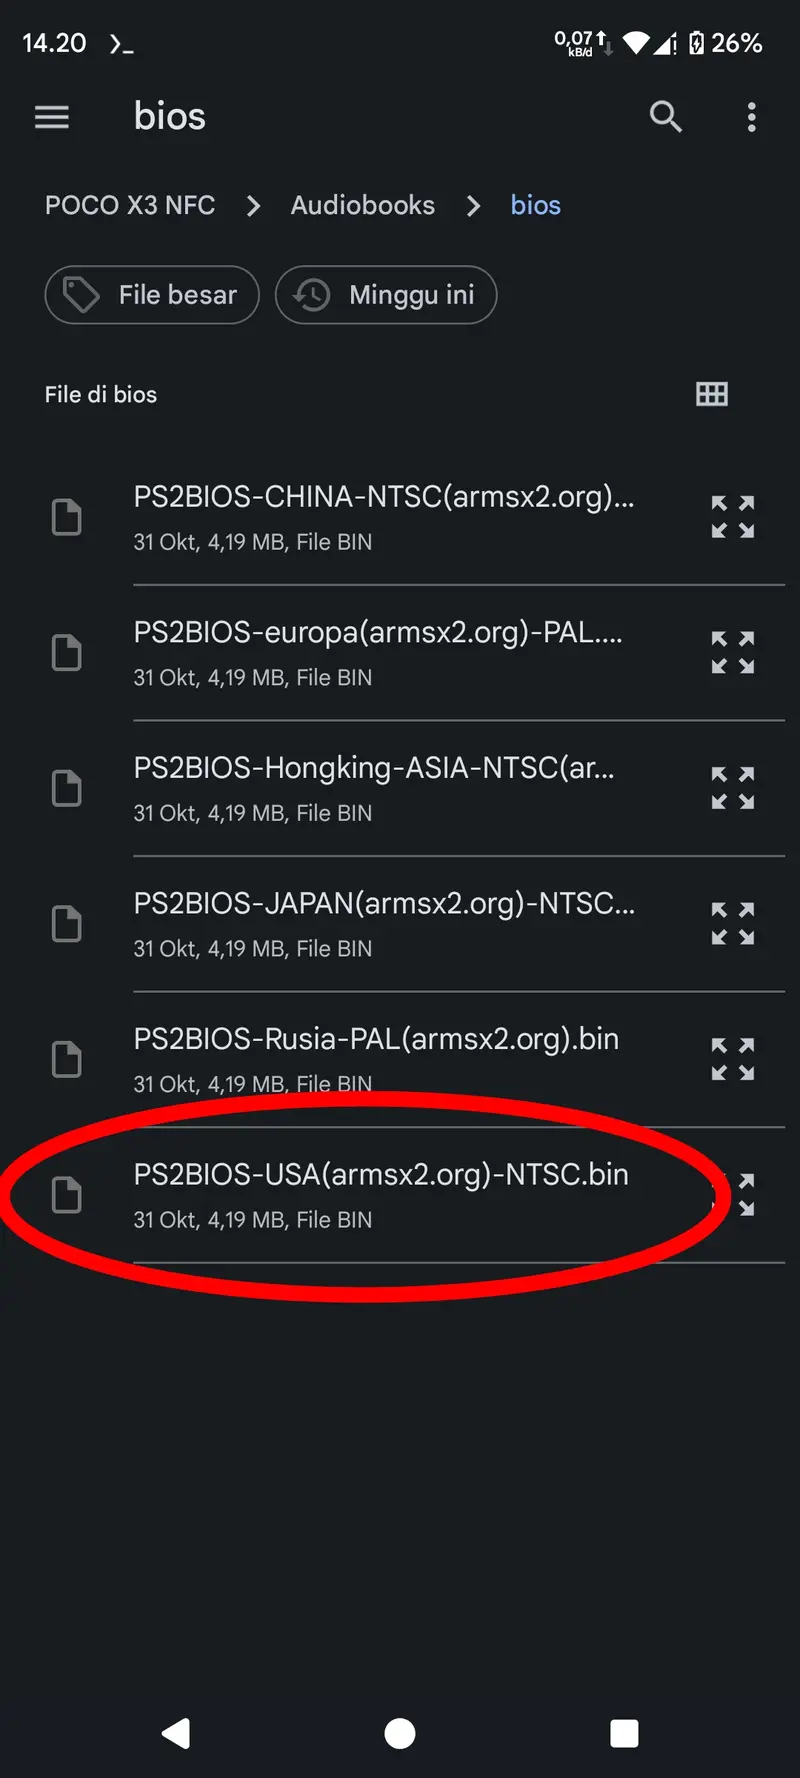
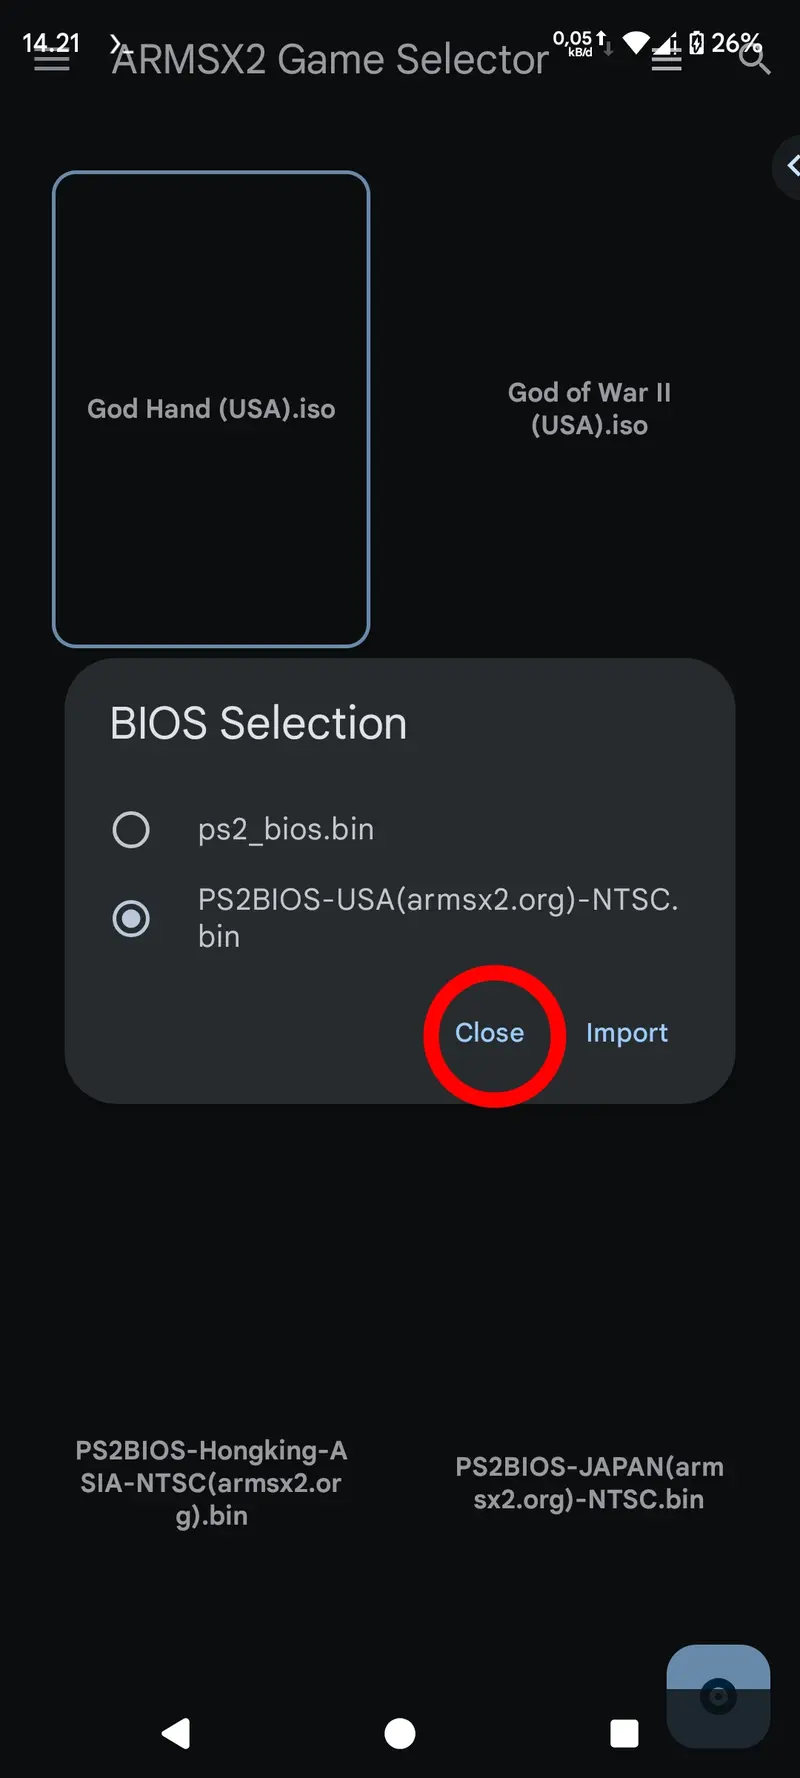
- Activate the Imported BIOS
Once the BIOS has been successfully imported, make sure you select it from the BIOS list. The blue circle indicates the active BIOS used in ARMSX2.
- Close and Play
Finally, tap "Close" to return to the ARMSX2 main screen. The BIOS is now imported and ready to run PS2 game discs on your device using ARMSX2.